
New Organisation
When initially setting up a Doshii integration for a venue that is not part of an existing organisation you will be shown this form in Impos Back Office
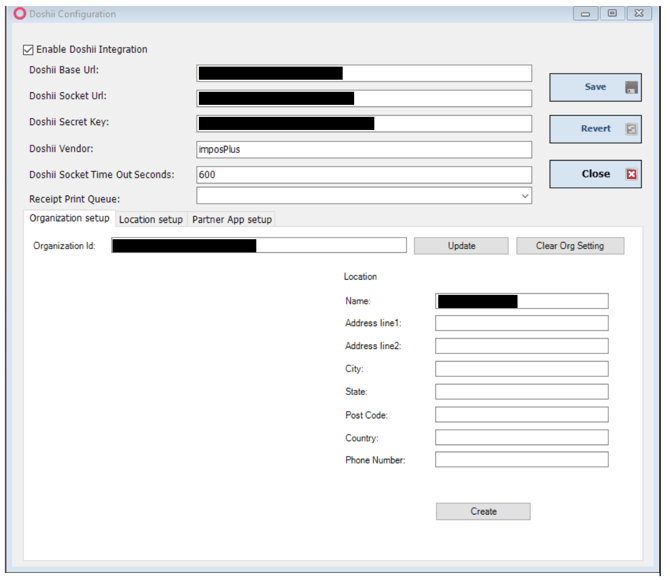
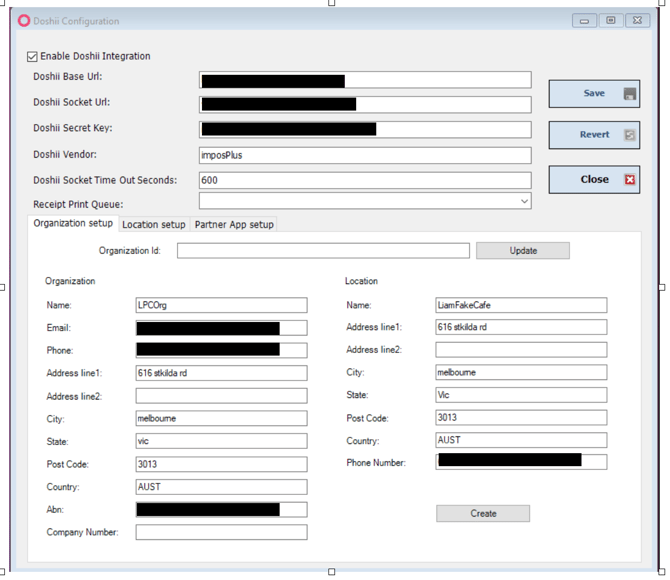
Populate the organisation and location details and select the create button.
The system will then contact Doshii and create an organisation and location and populate the OrganisationId and the Location Token in the database.
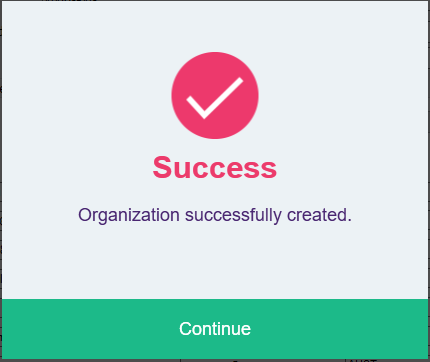
When the processing host is restarted the venue will be connected to Doshii.
New Location
If the venue you are attempting to onboard with Doshii is part of an organisation that is already onboarded with Doshii.
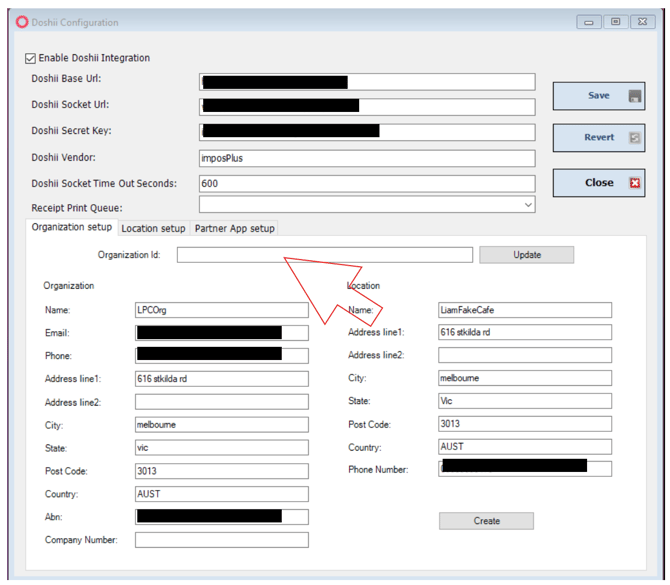
Enter the already existing Doshii Organisation Id into the organisationId field above.
Select the Update button.
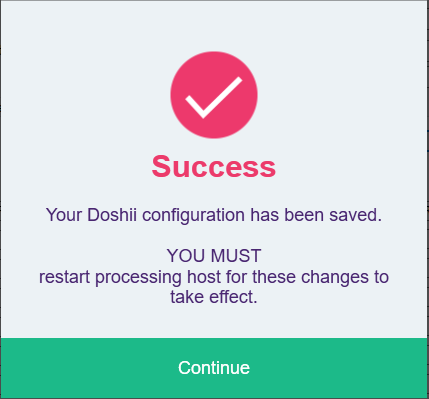
You can enter the new location details to configure the location
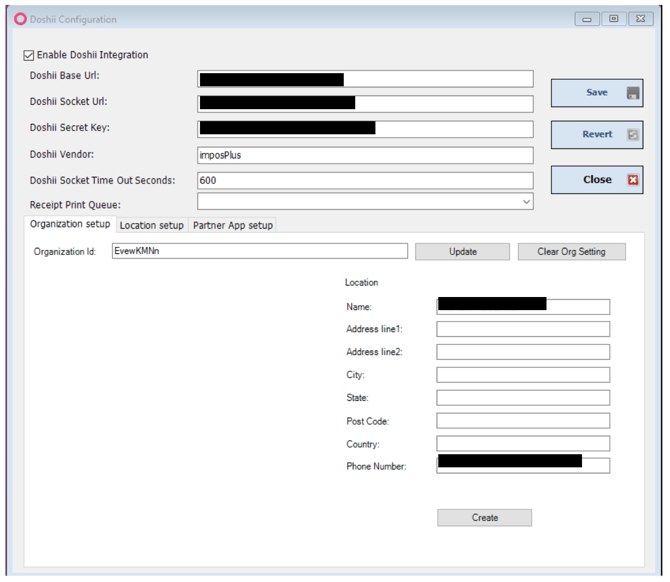
Pressing the create button will create the location on Doshii and populate the Location Token in the database.
You can still use the old functionality and just enter the Location Token into the Location setup tab to setup a venue.
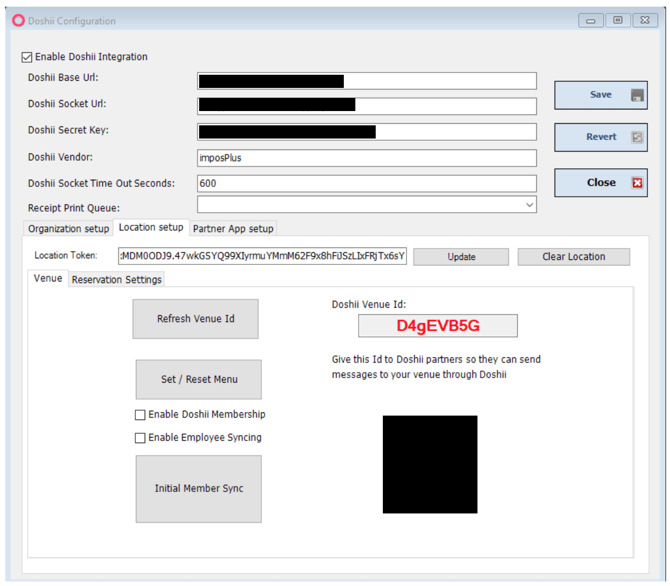
Clearing Organisation and Location Settings.
It is possible to clear the organisation settings by pressing the Clear Org Settings button on the Organisation Setup Tab.

It is possible to clear the Location Token Settings by pressing the Clear Location button on the Location setup tab.

Doshii Channels
Order Ahead
The order ahead Doshii channel is automatically activated when you configure the Doshii integration.
Rewards / Membership
If you wish to enable the Rewards / Membership
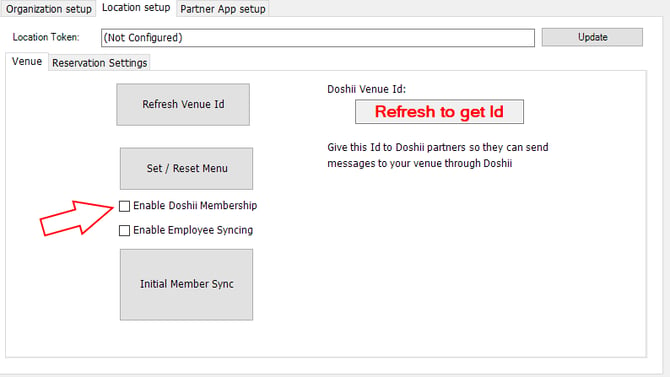
Select the check box indicated above.
Order Notes Visible on the Check Access Screen
When an order ahead partner adds notes to an order these notes are now visible on the Check Access Screen Check Details panel.
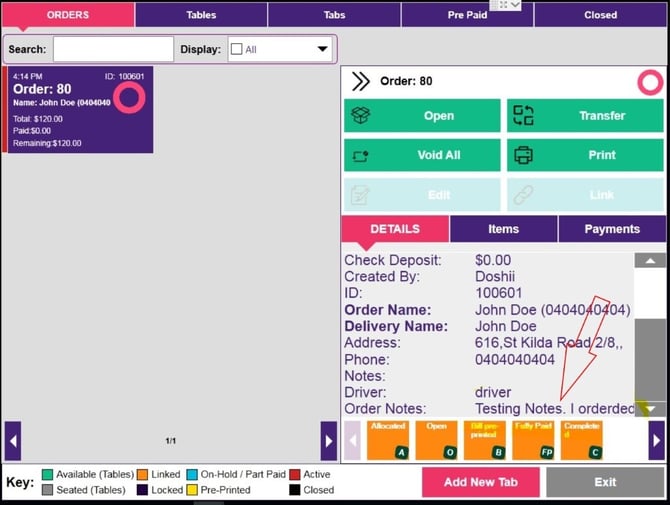
These order notes will also print on the kitchen dockets generated for this order.
Print Receipts for cloud payments
It is now possible to setup a print queue to print receipts for payment received through cloud integration platforms.
Print Queue Setup
To enable this functionality, you need to first create a print queue in Impos Printer Server the uses the custom docket ‘Standard Receipt Docket’

Adding the Print Queue
Open the Doshii Integration configuration page in Impos Back Office.
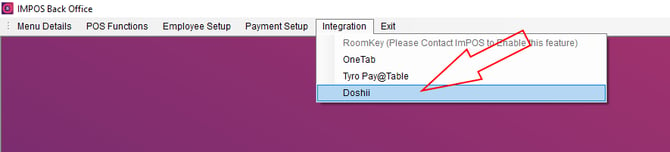
Select the custom print queue created in the print server in the Doshii configuration page.

Now when you receive a payment from a cloud provider; order ahead or pay @ table (ANZ blade) a receipt will be produced for the customer from the POS system.
Delivery Address, Required At time, and Customer Notes on kitchen dockets.
The settings for Custom Dockets have changed to make it easier to understand what will print on the custom receipts when you receive a doshii order.
Delivery Address
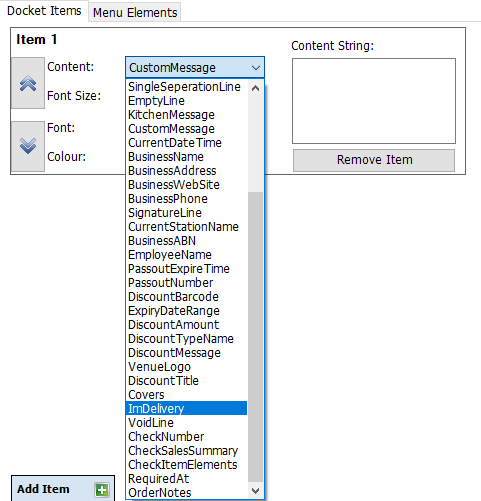
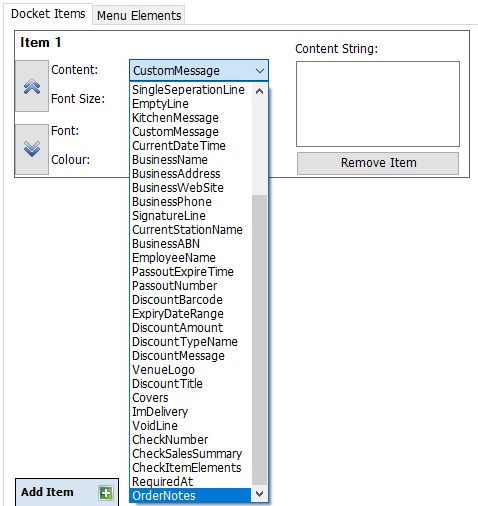
If you want the delivery address to appear on the kitchen dockets when you receive cloud delivery order you must add the ‘ImDelivery’ line item to the custom docket.
Required At Time
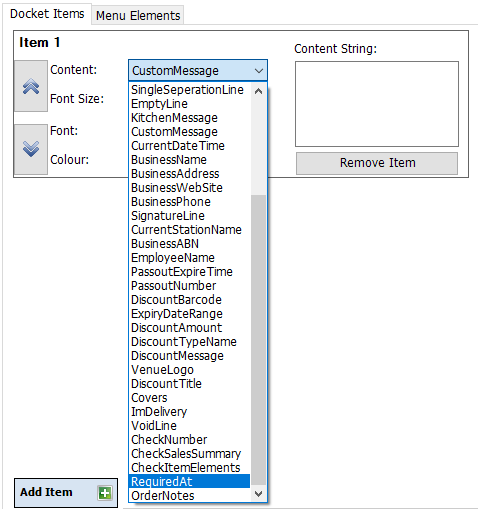
If you want the time the order is required for to print on the kitchen dockets when you receive a cloud order ahead or delivery order you must add the ‘RequiredAt’ line item to the custom docket.
Customer Order Notes
If you want the customer order notes to print on the kitchen dockets when you receive a cloud order ahead or delivery order you must add the ‘OrderNotes’ line item to the custom docket.
Allowing Apps to Fully Pay for Orders Without Closing the Tab
All Cloud orders will now appear on the check access screen under the ‘Tabs’ tab.

all new cloud order ahead orders are now tabs it is possible for an integration partner to fully pay for an order but the order will not be closed.
This is a per integration partner setting that must be set in back office.
Open the Doshii Integration settings in back office.
On the Doshii configuration page select the ‘Partner App Setup’ tab.
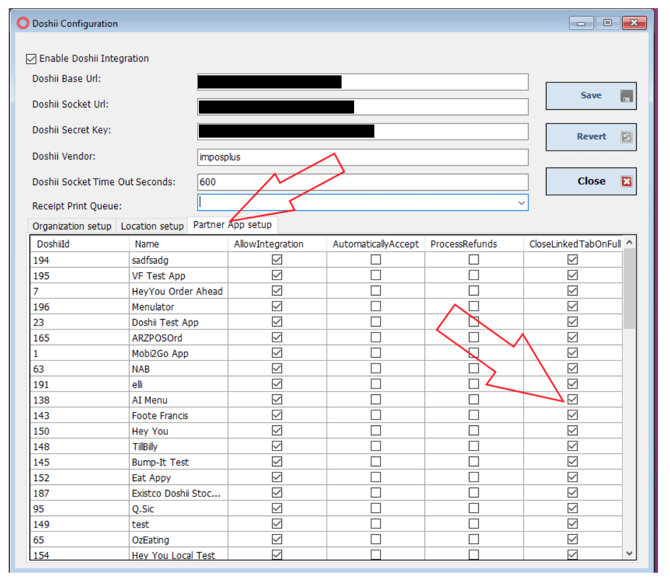
Navigate to the partner app you wish to allow to fully pay for orders and not close the orders.
Selecting this option means that no tab check (all order ahead orders, and any tabs created on the Impos system) that is fully paid for my the selected app will be automatically closed on the system. Normal orders and table checks (other than tabs linked to tables) will still be closed when fully paid by the partner app.